Artists Book
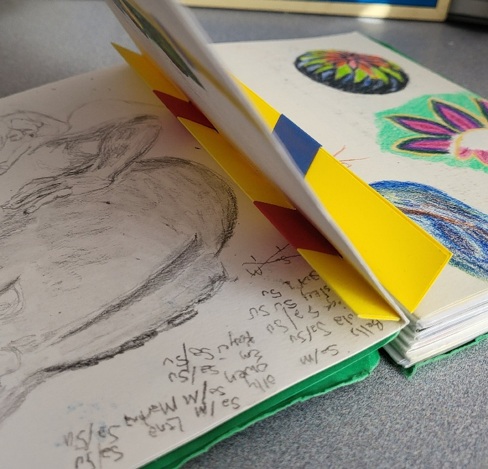
This style of book works great for artists as you can easily remove and swap out pages. This style goes by several names:
- Australian Tie
- Flat-Style Reverse Piano Hinge Binding
- Australian Binding
- Accordion Notebook (not to be confused with accordian bookbinding)
This style of book has these advantages:
- It is very forgiving when your folds and cuts are not perfect.
- This book style is tremendously flexible in the types of paper that you use. You want sturdy paper for the hinges. After that, you are free to experiment. Interior paper can be any foldable paper you want to draw or paint on.
- This binding style can be created with several variations. Some steps have a * to let you know ways that you can make adjustments.
Materials
- Paper for Hinges
- Sturdy paper to make 2 strips 12-14 inches long.
- Paper for Sliding Strips
- Paper to make 5 strips that are 2” by the length of your paper folded.
- Paper for the interior of the book
- Any foldable paper works so pick what you want to draw and/or paint on. Some paper with very pronounced grain may not work well if the grain is the same direction as the fold. The size in these examples is A4 but 8 ½”x11” works close enough. The paper does not have to be the same size.
- Paper for the exterior of the book
- This is often stiffer paper, card stock or another surface that you will glue the hinges to. You can also use inside pages to help support the hinge.
- Exacto knife/box cutter/Scissors to cut paper
- Pencil
- Ruler
- White/craft Glue
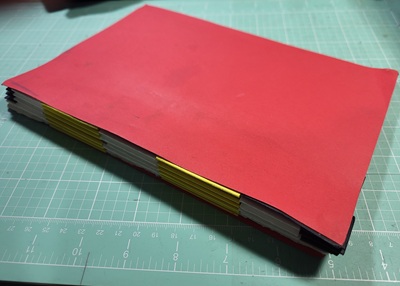
In this example, the interior pages are white heavy drawing paper. The other paper is cardstock in different colors. The different colors were chosen to make the finished book more “fun” but also to make it easier for you to see how the different parts work together.
Instructions
The first time that you assemble this book, it will likely take 2 hours. After making a few, constructing one will take less than half of the time.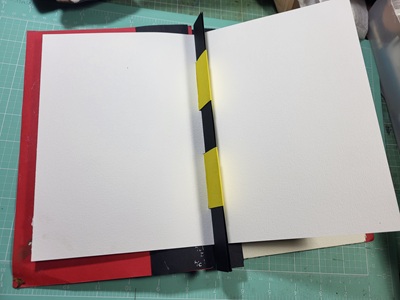
- Take the sheets that you are using and fold them in half. I tend to match the paper corners for the fold but then I slide my finger to the center between the 2 corners. Then, I run the finger to the center of where the fold will be. From there, I run 2 fingers away from that point. I get better folded pages this way. Do a minimum of 6 sheets - 5 to go into the book initially and one extra so you have a mockup of where the paper slits will go as you make replacements. Remember that a feature of this binding is how you can change your mind about which paper goes into the interior of the book. Note: If you are combining different types of paper, you may want to write what type of paper it is in light pencil in the corners. That way, you will later know what paper you used for specific drawings.
- Put the ruler along the fold and mark the center of the fold and then measure 3/4" on either side. This is the center 1 ½ part of the fold that does not have a hinge.
- Mark 1 ½ from the 3/4 marks you made. This is also 2 1/4 from the center marking. Doing the marks this way, handles when the interior pages are different sizes.
- Repeat the markings on the fold of each page. To make this step easier, I put the markings on the first page then spread the folded pages so that the folds are staggered and I can do one line to mark all pages.
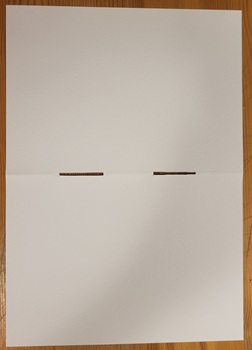
- Cut slots about 1/16” wide in the fold at the top and bottom 1 ½” markings. Usually, I cut into one end of the slot with the scissors and then pivot the scissors to cut to the other end.
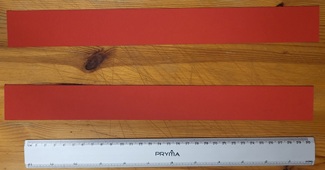
- Cut the strips for the hinges. They should be 1 ½” wide and 12” to 14” long. * If you don’t have paper that is long enough, you can make the hinge folds shorter to accommodate. For 11” long paper, I often do a bend every 3/4” rather than every inch as mentioned below.
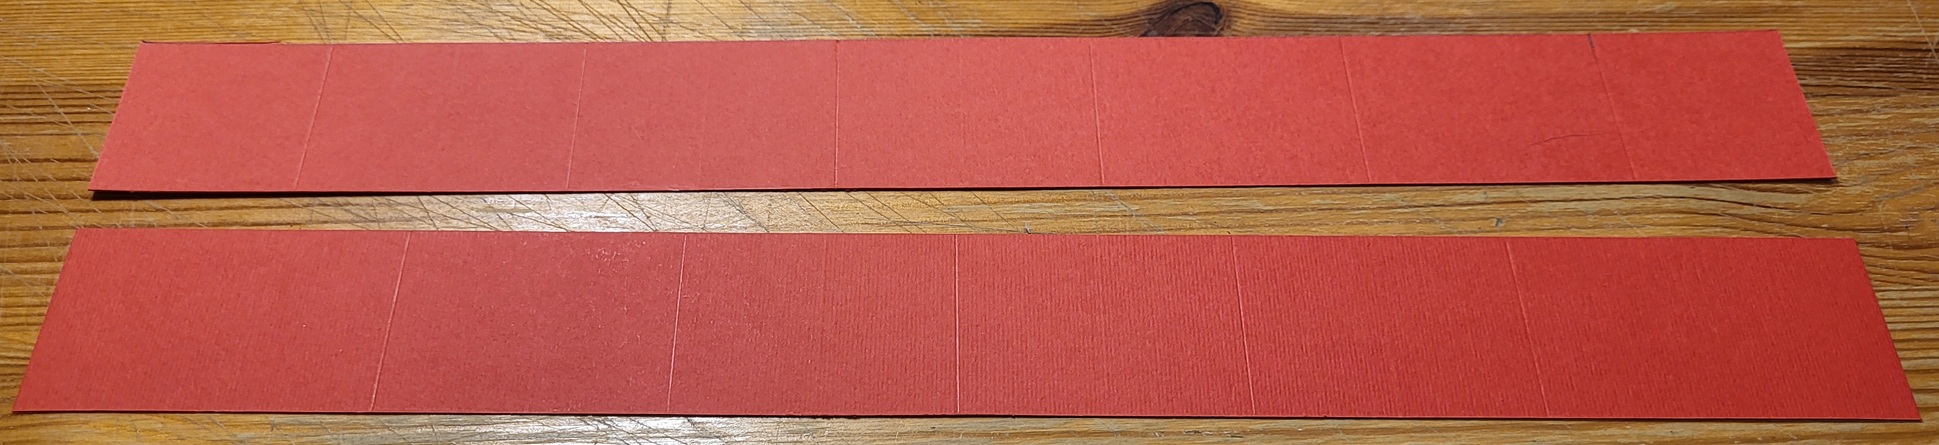
- If your strip is 12”, mark the strip for every inch. If your strip is longer than 12”, take the amount over 10”, divide that by 2 and add it to the first distance before measuring every inch. This means if your strip is 13”, measure 1 ½”, then 1” for the rest of the strip except for the last 1 ½”. For 14” strips, it is 2” until you start measuring every inch.
When done, you should have 10 spaces 1” apart.
* If your strip is 11" long, your measurements are 1", 1 3/4", 2 1/2", 3 1/4", 4", 4 3/4, 5 1/2", 6 1/4", 7", 7 3/4", 8 1/2", 9 1/4", 10". You will end up with 6, not 5 sheets in your book.
- Score the strip at the 1st, 3rd, 5th, 7th, 9th and 11th marking. Also the 13th marking if using an 11" strip with 3/4" folds.
- Fold the strip inward where you have scored the paper. It will have a C-ish shape.
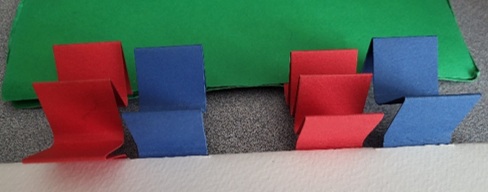
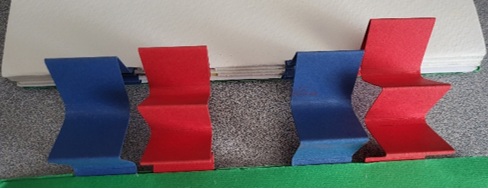
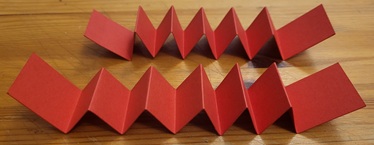
- Fold the strip from the other side in between the folds you did in the previous step. You are turning the “C” into an accordion fold. You want to make sure the hinge stays straight. Now your hinges look like this:
- Cut the sliding strips used for the hinge. You want 5 strips that are actually 1 7/8 in width and the length of the folded paper (i.e. 8 ½” when using 8 ½”x11” paper) To make it easier to measure, you can do one of two things – measure the strips at 2” and then trim them afterwards. The 1 7/8” measurement isn’t a rigid measurement. The other approach is to measure the 1 7/8” for a strip then slide the ruler so the 2” is where the 1 7/8” indicator is and do the next 1 7/8” measurement. This way, you don’t need to do the math.
- Fold the strips in half longways.
- Line up the slots parallel to each other going away from you.
- Hold the end tab of the hinge, open the folded page and slide the sheet into the next ^ on the hinge. Repeat for the other slot on that page.
- Inside the folded page that you have put the hinge onto, slide the strip into the first hinge and then the second. It does not matter whether the fold on the slider is at the top or bottom as you slide them into the slots. I recommend that whichever way you do it, you do it consistently.
- Put the next page onto the next fold of the hinges.
- Repeat the step of flipping open the inside and inserting one of the sliding pieces into both hinge folds.
- Continue adding each page to the hinge folds then adding the sliding paper into the loops of the hinge.
- Trim any extra paper on the sliding parts of the hinges (if needed).
- Cut 2 pieces at least as large as the pages in your book.
- Glue the strips at the end of the hinge to the back cover. * There are many ways to enhance the binding. At this point, the limit is your imagination.
- Strengthen the hinge support by adding a second piece on the inside back cover that covers the hinges.
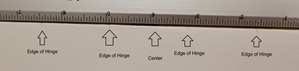

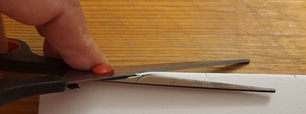
When the slots are cut and the pages grouped together, it looks like this:

Each sheet when laid flat will look like this:
You can also score and fold the 2nd, 4th, 6th, 8th and 10th lines rather than just doing it by eyesight but I have found that the hinges often end up twisted. Doing it by matching it up by eyesight usually creates straighter hinges.
This one part needs to be exact: The hinge when folded needs to be straight not crooked. Most of the rest of the book is very adaptable to fluctuations in construction.
Remember if you are using 3/4" for the hinge folds rather than 1", you want 6 sliders and they should be just under 1 1/2 before you fold them longways.
*If the strips are longer than the folded pages’ folds, you just trim them later. If they are shorter than the page fold, they are fine as long as they are long enough to go under both hinges.
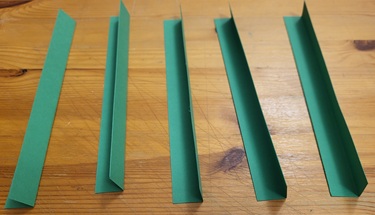
Now, you are ready to assemble the hinges.
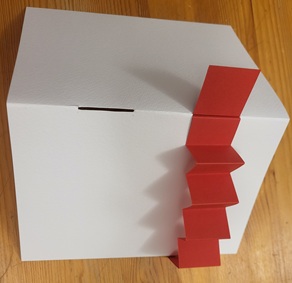
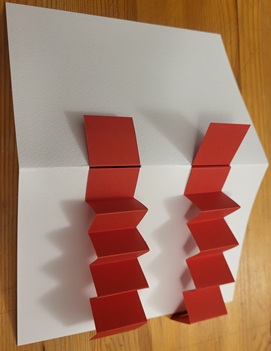
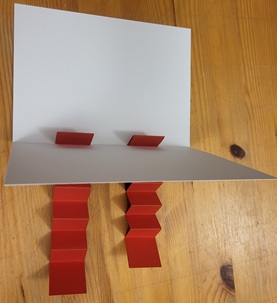
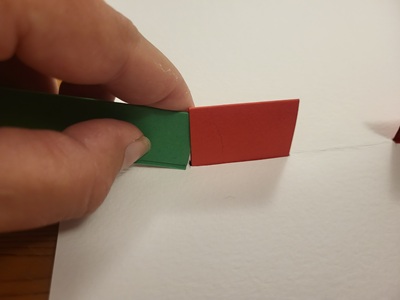
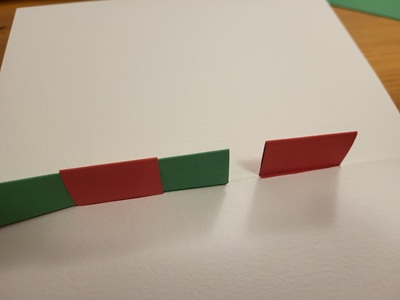
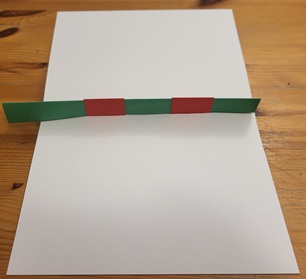
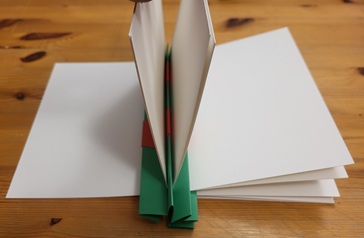
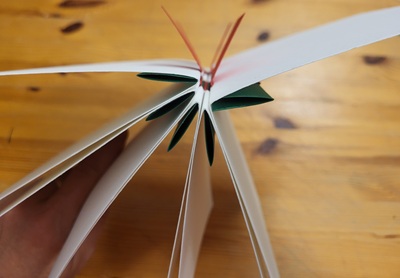
* After you have made one or two of these books, you may find it easier to put all the folded pages in the hinges first then go back and put the sliders in. However, do not try this when you are assembling your first one.
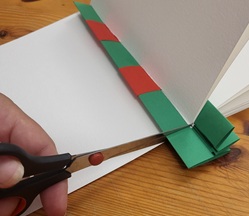
Now, the hinge from the side and the top looks like this:
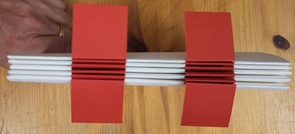
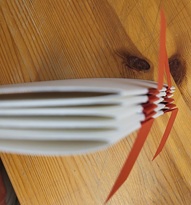
Notice that at the ends, only the last part of the hinge paper sticks out. If you have more, you need to adjust. You will be better off removing sliders and repositioning paper now to get everything correct.
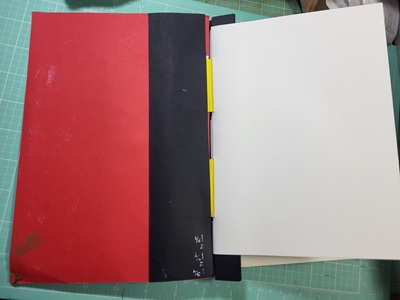
Now, you are ready to attach the hinge to the front cover. The ending portions of the hinge are up to you for how you want to attach to the cover. The limit is your imagination. The following steps provide a simple cover. If you have more experience, you are welcome to attach these pages to the book cover style of your choice.
For instance, take the cover paper, fold it in half and then glue the folded cover and tuck the hinge edges into that folded page.(br)
Replacing Pages
Part of this style’s appeal is the ability to swap out pages. To do this:Variations
There are several ways this design can be tweaked. They are covered below. I would suggest making one simple one before doing a fancier one.
Size
These books can be as small or large as you want them. Make them smaller and you likely want narrower hinges. You can even make it with a single hinge. Make them larger and you may want more hinges. The more hinges, the more exact you want to be with the hinge folds.Hinge Width
This example uses 1 ½” width hinges. There is no magic in using this number. Thus, you can do any width of hinge. I’ve also taught this book style with 2” hinges because it is easier for math. It can be less too.
Multiple Sheets per Page
You can actually put multiple pages in each of the hinge folds. The number of pages is determined by how thick the paper happens to be. So I might only have 1 page if it is thick watercolor paper but 2-3 if it is thinner drawing paper.
Longer Hinges
The steps above create a book with 5 sheets. You can make the book with more pages simply by lengthening the strips used as the hinges. Another possibility for more pages is the height of the hinge or using double hinges as described below.
Height of the Hinge
I used 1” in the examples because it is easy to measure. You can also use something like ¾” or ½” hinges. Having shorter hinges means you can get more folds and thus more pages into your book. The smaller the hinges, you may be more challenged with getting the hinge strips into place. The minimum hinge size is based on your fingers and how easy you want sliding the hinges in and out of the book.
The following shows a 5"x7" book with 3 hinges and different sized paper attached at the set of hinges. The hinges are a mere 1/2" in height.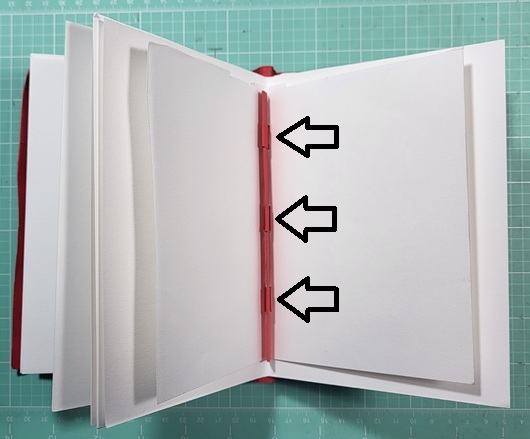
Larger Paper
As you make the book larger, you may need more hinges for support. You may also need want a rigid exterior cover.
Uneven Paper Sizes
You can have paper of different sizes in the book. The issue becomes cutting the slots. The instructions above reference finding the center along the fold and measuring from that. This centers the page between hinges.
Non-Removable Pages
If you want to prevent pages from being removed, you can glue the sliders in place by putting a spot of glue inside the hinge fold to prevent the slider from sliding. Do it after you have put the slider into place. You can make the slider piece slightly shorter than the distance needed and then glue the hinge fold ends closed.
Covering the Exterior Spine
If you want to cover the exterior spine, you can. The spine cover is added at the end as either part of the front and back covers or after the front and back covers have been added. You can put a separate paper that wraps around and is glued to the front and back covers. You can also use longer paper to provide both the cover for the front, spine and back then attach the hinges as appropriate. While you can use glue on the hinge parts that touch the spine, be cautious to not get any glue on the parts of the hinges where the slider needs and make sure that the sliders are not glued into place (unless intentional).
Double Hinges
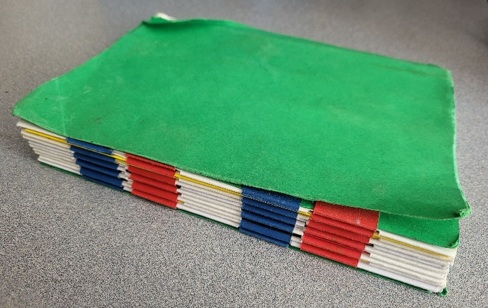
You can use double hinges in the book to double the number of pages that you have in the book. In this (well-worn) example, the blue is one hinge and the red is another. The sliding bars which peak through the binding are randomly yellow, black and red. When I assemble this book, I lay out the red hinge, the blue hinge then the red hinge and the last blue hinge. When adding the pages to the book, I first added a page to the blue hinge. Then, the red hinge, then the blue and so on (see table below). I did the measurements at every 3 cm (the fold was close to 21cm in length). For cutting the slots for this paper, I cut out slot 2 and 5. It meant for some, I turned the paper upside down (which turned the page into having slots at 3 and 6).
| Hinge Color 1 | Hinge Color 2 | Hinge Color 3 | Hinge Color 4 | Hinge Color 5 | Hinge Color 6 | Hinge Color 7 |
|---|---|---|---|---|---|---|
| Red | Red | |||||
| Blue | Blue | |||||
| Red | Red | |||||
| Blue | Blue | |||||
| Red | Red | |||||
| Blue | Blue | |||||
| Red | Red | |||||
| Blue | Blue | |||||
| Red | Red | |||||
| Blue | Blue |
The sliding pieces of the hinges were a bit more narrow (1 ¾” vs 1 7/8”) to account for the hinge having to go around the page handled by the other color. Also, keep in mind that this can be expanded to triple or quadruple hinges. If I do this, I will have to account for the thickness of the paper folds that I am skipping over. Granted, just using longer pages for the hinges also gets more pages in the book.